SP480TV - 2U Temperature-Controlled High Airflow Rack Fan System
Delivery and Shipping
Delivery and Shipping
Stock items ship in one to two business days. Out of stock items typically ship within one week, or up to 8 weeks. Contact us for lead times.
Free UPS Ground shipping to the USA with purchase of a rack fan system!
Need help?
Need help?
Need it fast? Need a large quantity?
Call or email us for a quote.

SP480TV - 2U Temperature-Controlled High Airflow Rack Fan System

Airflow
212 CFM
Noise
45 dBA
Description
Description
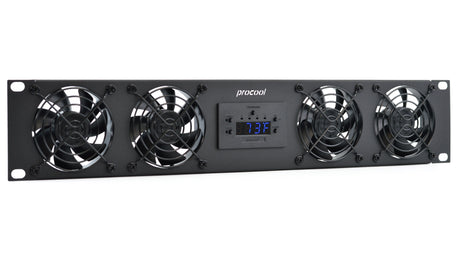
PROCOOL SP480TV is a temperature controlled, High Airflow Rackmount fan system.
The SP480TV, with four temperature-controlled high airflow fans, boasts a powerful 212 CFM airflow. Designed for IT professionals, this 2U rack fan system is suitable for various setups - from single rack systems to large data centers. Its automatic temperature control feature makes it a top choice for efficient and reliable cooling.
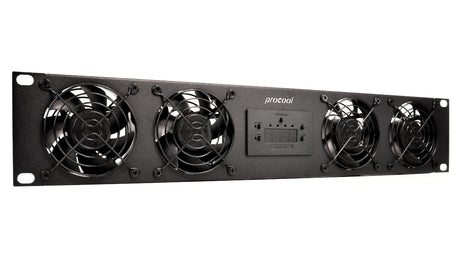
Available in both intake and exhaust versions.
The Intake model SP480TV blows air into the rack.
The Exhaust model SP480TV-E pulls air from the rack.
Select the grill option. Black (Standard), Chrome or Filters.
See Connecting multiple fans section below, for details about slaving fans in a system.
Specifications
Specifications
-
Panel size
-
Panel color
-
Panel material
-
Number of fans
-
Fan dimensions
-
Fan size
-
Fan model
-
Fan speed
-
Airflow
-
Noise
-
Bearings
-
Static pressure
-
Power consumption
-
Fan voltage
-
Current draw
-
Controller temperature sensor wire length
-
Grill type
-
Power supply model
-
Power supply voltage
-
Power supply cable length
-
Power supply AC plug type
-
Power supply DC plug type
Connecting multiple fans
Connecting multiple fans
- Link multiple fans together in different configurations.
- Link fans to temperature controlled models so all fans are controlled by temp.
- Link standard fans together so all share a power source.
- Link cabinet fans and rack mount fans together.
When combining fans note the amperage draw of each fan added to the system. Add all of the amp ratings together. The total should be half of the amp rating of the power supply being used. Most systems run on a 1 or 2 amp power supply others up to 6 amp is required.
For standard rack mount fans, connect the power supply to the first fan. This will be the master control. Then connect more fans to the slave fan connector. Slave connectors are standard on SX and SXT series fans. TV series fans can be custom made with slave option.
For temperature-controlled rack fans, connect the power to the controller unit. Then using the PSA-SP Adaptor cable, connect additional standard rack fans.


Temperature controller instructions
Temperature controller instructions
THERMAL PROBE:
Position the probe where you want it to detect the temperature. It can be left as is on the panel for an ambient temp. Or it can be placed at the top of a cabinet or above a hot component. Try to avoid placing the probe where the fans will blow directly on it. For best results, locate the probe where it will detect the most heat.
PROGRAM:
Press the PROGRAM button to set the on and off temperatures for each of the 4 zones. Press the PROGRAM button to begin. All LED’s will turn on indicating programming for Global Mode. All Zones will operate with the same temperature. Press PROGRAM again to toggle between Zones 1 through 4. The LED for the selected zone will turn on. To exit program mode press PROGRAM until all LED’s turn off. Settings will be automatically saved.
START / STOP:
While in the selected PROGRAM mode, press the START button to set the temperature where the fans should turn on. Use the UP and DOWN buttons to change the temperature. Then press the STOP button to set the temperature where the fans should turn off.
Hold START and STOP together for 3 seconds to switch to Always On mode which bypasses temperature control. The screen will display bp for bypass mode. The fans will continue to run until switched back to temperature mode or powered off.
UP - C/F - Display:
Press the UP button to toggle between Celsius “C” or Fahrenheit “F” (when NOT in Programming mode). Press and hold the UP button for 3 seconds to enter DARK mode. The indicator lights and display will shut off. The controller will still function as normal. Repeat to turn the display back on.
DOWN:
Used only for setting the temperature in programming mode.
HEATING FUNCTION:
Set the START temperature lower than the STOP temperature. The controller will run until the stop temperature is reached and the environment is heated to the set temperature.
Product comparison
| Facet | |||
|---|---|---|---|
| By | |||
| By | Procool | Procool | Procool |
| Price | |||
| Price |
Sale priceFrom
$199.99
Regular price
$229.99
Unit price
|
Sale priceFrom
$199.99
Regular price
$229.99
Unit price
|
Regular priceFrom
$229.99
Unit price
|
| Rating | |||
| Rating | - | - | |
| Product variants | |||
| Product variants | Airflow Direction
| Airflow Direction
| Airflow Direction
|
| Panel size | |||
| Panel size | |||
| Number of fans | |||
| Number of fans | |||
| Fan model | |||
| Fan model | |||
| Fan speed | |||
| Fan speed | |||
| Noise | |||
| Noise | |||
| Airflow | |||
| Airflow | |||
| Static pressure | |||
| Static pressure | |||
| Power supply model | |||
| Power supply model | |||
| Weight | |||
| Weight | - | - | - |